
“The best camera is the one you have with you”
Chase Jarvis
Perhaps more befitting for this blog post, “the best [smartphone] is the one you have with you” — is a well-known saying in response to the most frequently asked question in photography: which is the best phone model?
Having the latest model with improved megapixels, sensor and pixel quality can certainly help you get better quality shots but that doesn’t mean you should go ahead and make that purchase that will break the bank. It is more important to understand the basics of photography and to know how to apply them in practice.
Before we get into the basics of photography, let’s talk about the advantages of smartphone photography.
Always one reach away. For most of us, that little handy device we treasure so much has taken up residence in the back pocket of our pants or in our handbags.
Lightweight & affordable. Your smartphone certainly weighs and costs much less than a DSLR camera!
Fast & easier setup. In most situations, all you need to do is take your smartphone out of your pocket and you’re ready to snap away. As you get more into smartphone photography, you’ll probably notice that the use of a lightweight tripod may come in handy. Yes, it is a another piece of gear to carry, but it also opens up a whole new level of phone photography!
Instant editing & sharing. Capture, edit and share — all of this can be done right from your smartphone.
Mastering the Basics of Smartphone Photography
Don’t panic if you don’t fully understand how exposure, ISO, shutter speed works. Don’t let the technical side of photography get to you even before you begin! Just try to follow the tips that I am about to share with you and I am pretty sure you’ll feel more confident with your phone photography in no time.
So these are the few key points that I always go by when I plan or setup for a shot:
1. CHECK YOUR FOCUS
Found a cool insect or frog? Are its eyes in focus? Typically you’d want your subject’s eyes to be in focus, this will draw the viewer’s attention to your photo.
You may have noticed that the autofocus on your phone’s native camera doesn’t always work where you want it to, especially in low-light situations. This problem can be solved by using a camera app that allows manual control over the focus. Since I started using their lenses, my current go-to app is Moment Pro Camera, but I’ve also used ProShot extensively in the past and tried a few others (Halide, Manual). There are so many apps out there so don’t be afraid to try out a few until you find one with a user interface that suits your style of shooting.
2. THINK ABOUT YOUR COMPOSITION
There’s nothing wrong with framing your subject right in the center, and certain shots may appear more striking when framed that way. In addition to that, you should also consider using the rule of thirds when planning your shot.
Despite its name, I’d like to think the Rule of Thirds as more of a guide rather than a rule, when it comes to framing my shot. Most smartphone cameras (and all 3rd party camera apps) have the option to turn the grid on, so be sure to check your app settings. On iPhones, you can find it under Settings > Camera.
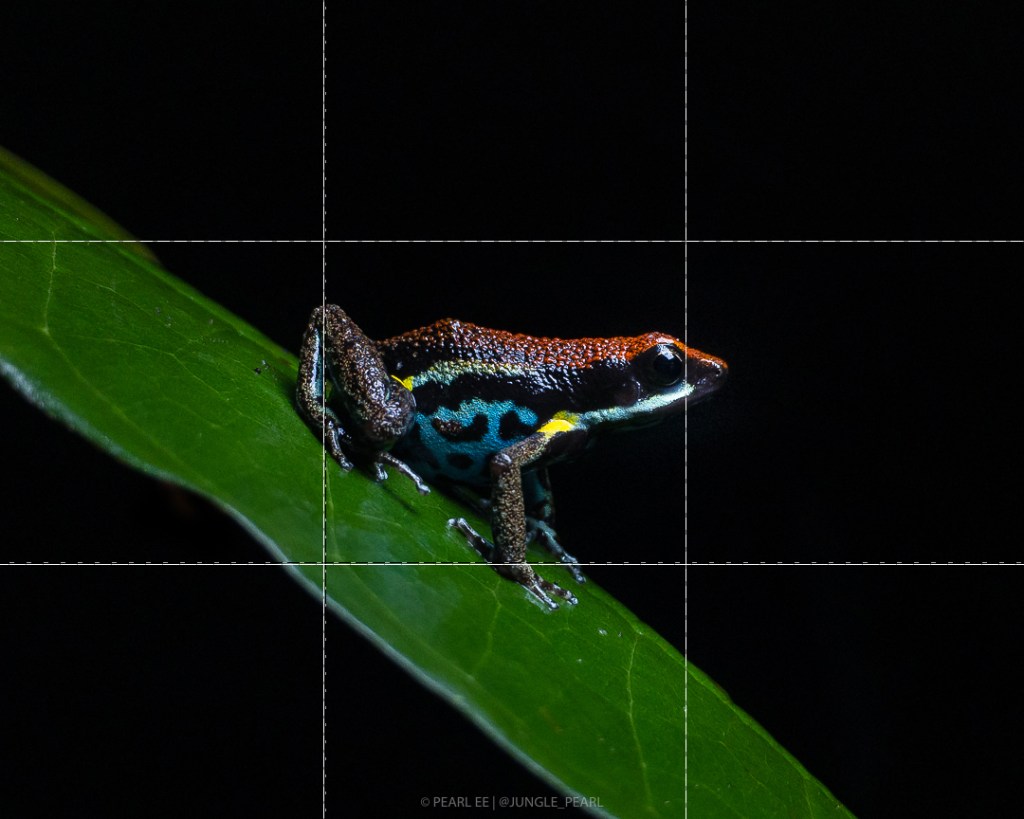

The same photo of the Ecuador Poison Frog (Ameerega bilinguis) [above] was cropped differently. The photo on the left positions the frog dead center of the frame whereas the photo on the right was cropped with the rule of thirds in mind.
Remember to pay attention to your horizon. Nothing ruins a photo more than having an angled horizon, but of course this can be fixed easily with most photo editing apps!
And try different angles! Experiment by taking multiple shots of your subject from different angles, the results might surprise you.
3. AVOID USING THE ZOOM FUNCTION
Never, ever zoom when taking a photo. When you pinch and zoom when capturing an image, what actually happens is that the phone applies a digital zoom, rather than the magnification zoom that you get from external lenses. Digital zoom causes the loss of pixels, leaving you with a poor quality, grainy image.
4. TIME OF DAY
Golden hour. Blue hour. Magic hour. These are the few words that you might come across when eavesdropping on a conversation between photographers. Check out this great post by Germán Marquès on photopills.com on understanding the different light phases in photography.

Photographers often chase good lighting conditions and this can mean getting up really early and setting off in the dark to setup for a shot just as the sun rises. Light conditions are considerably much better during sunrise and sunset, because the light during these hours are at an angle (thus giving more shadow and depth to your image) and the light is much softer.
Try to avoid taking pictures in bright daylight. Photos taken when the sun is blazing tend to come out with too much contrast, blown out highlights and dark shadows, or generally overexposed. If you can, wait for a cloud to block out some of the sun’s harsh light or plan your shot to take place during the magic hours (sunrise and/or sunset).
5. LIGHTING CONDITIONS
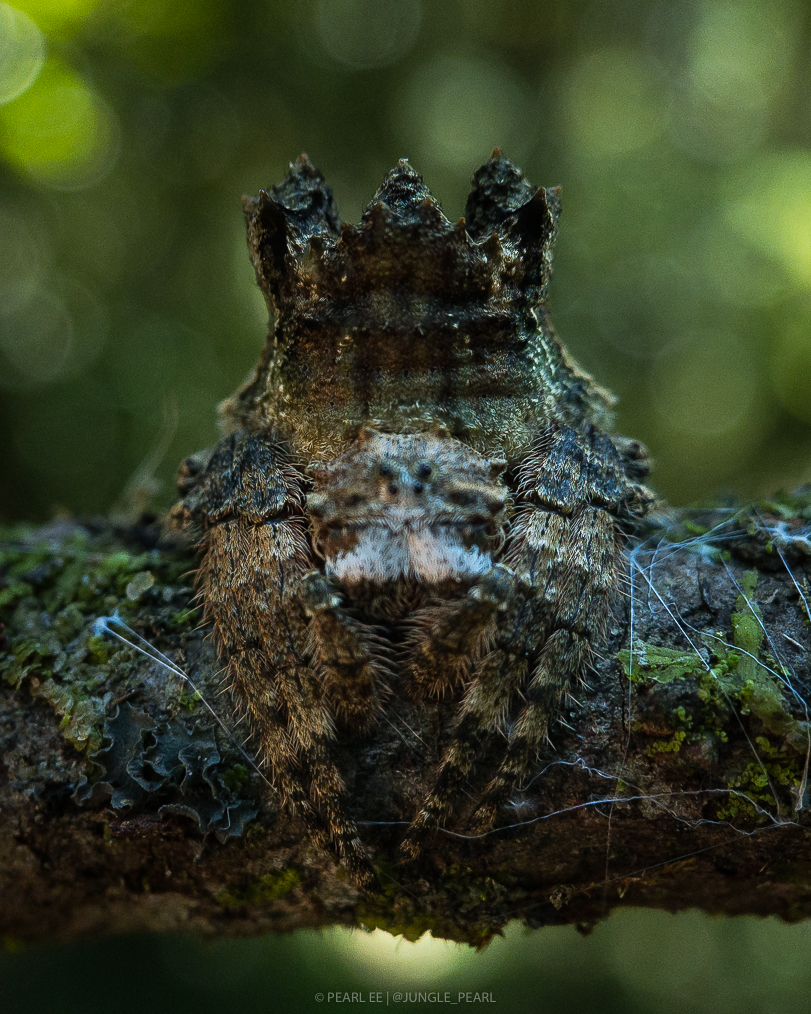
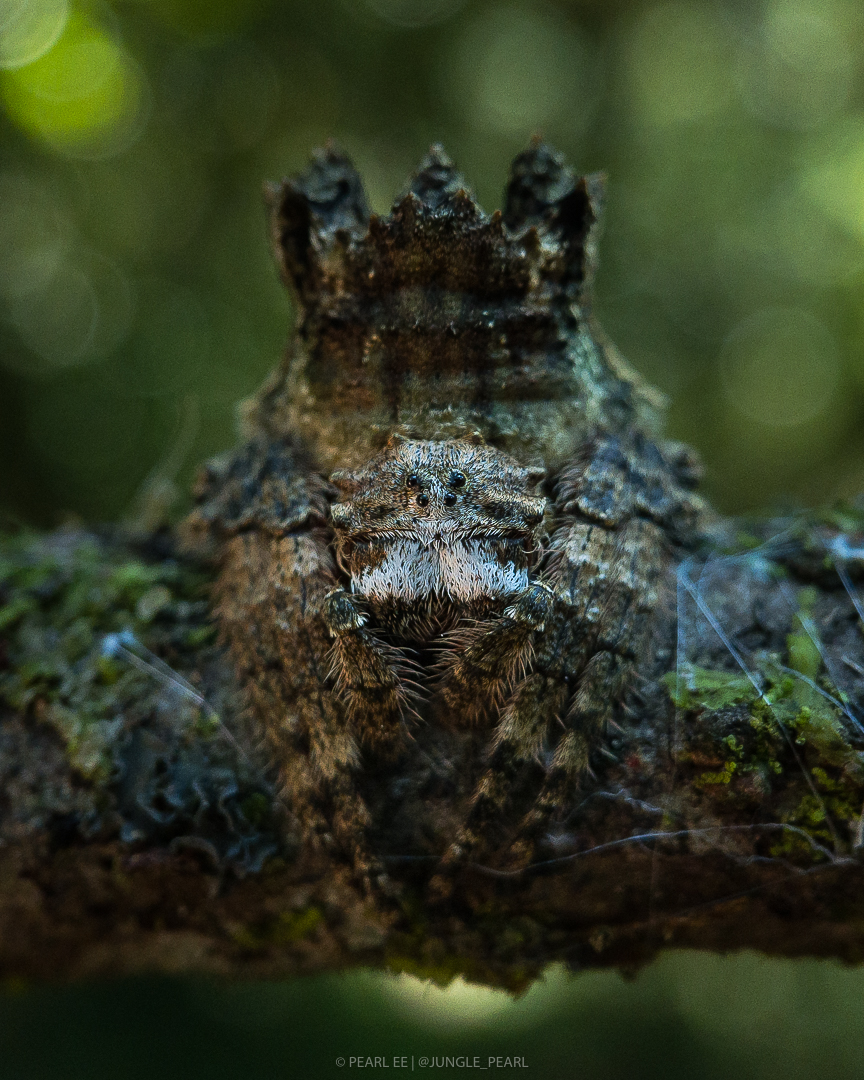
One of the biggest challenges in phone photography, especially when it comes to photographing wildlife in the rainforest, is being able to get enough light on your subject. Lighting conditions under the dense forest canopy or the underbrush can be rather challenging to work with. You’ll notice that quite often the image on your phone’s screen appears much darker than what your eyes perceive. This is due to the size of the sensor in your phone’s camera — it is rather small and thus you’ll need a lot more light than you think.
Avoid using the on-camera flash. When your light source comes from the same direction as your camera, the result is often an overexposed subject or foreground with harsh shadows.
This is when a little supplementary light will come in handy. I’d highly recommend getting a light panel that can take rechargeable batteries as you can be going through sets of batteries quite quickly when using the light on full power. You’d also be doing our planet a little favor by using rechargeable batteries rather than the one-off use types. I personally use Wansen’s W160 LED Video Lighting, but you’ll find that there are many other better LED lights out there.
Don’t forget to try lighting your subject from different directions. Varying the direction of your light source can have very different effects on your photo!
In the two images below, the shot on the left was taken with the light source coming from above the subject and partially obscured by a leaf; whereas the shot on the right, the light was coming directly in front and above the subject.

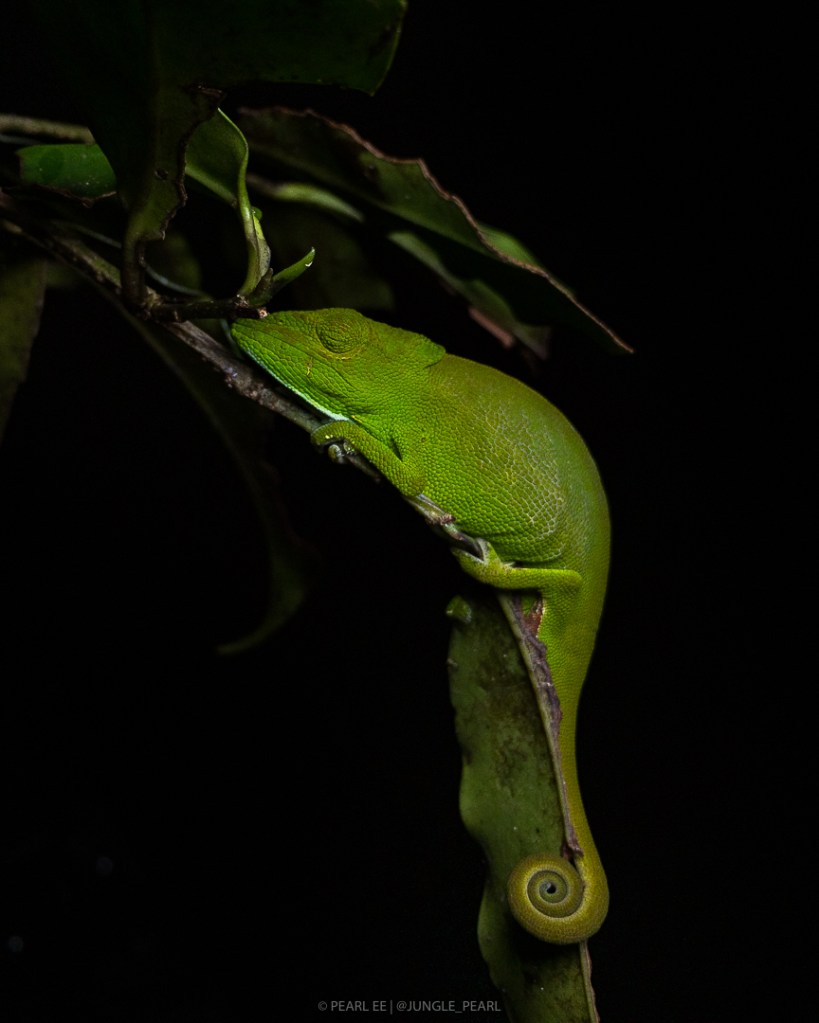
Glaw’s Chameleon (Calumma glawi) — both photos were taken with iPhone 6s, Moment Pro camera app, at 1/220s, ISO 25, LED light panel.
6. KEEP YOUR HAND STEADY
No matter how steady you think your hands are, motion blur or camera shake can still happen. So try to keep your hands steady by propping your elbows on the ground, or on the side of a pillar, or anything you can find that’ll aid in preventing a blurry photo. Consider getting a lightweight tripod if you have uncontrollable shaky hands like I do!
By using a tripod, you’ll find that you are able to decrease your shutter speed (as this allows more light to be captured by the camera sensor) and thus you will still be able to take photos that are sharp even in low-light conditions (i.e. under dense rainforest canopy or on the forest floor).
7. TAKE LOTS OF PHOTOS AND HAVE FUN WHILE DOING SO
Don’t get too caught up in the technical aspects of photography. When I first started smartphone photography, I made several mistakes — most of my images didn’t have its focus in the right spot or my exposure was off — and I still do, but that’s OK! Practice makes (near) perfect — the more you do it, the better you’ll get!
GOOD LUCK!
2023 Pearl C. Ee | Jungle Pearl © All Rights Reserved

Leave a comment